
In previous posts, I have shown you how to export and import machines from one Hyper-V host to another (see post titled “Importing & Exporting Hyper-V VMs in Windows Server 2012 R2“). I have also talked about building new virtual machines from scratch. There are many scenarios where it makes a lot of sense to virtualize an existing system as is. In essence, you would convert a physical server to a VM (virtual machine). We call this a Physical-to-Virtual (P2V) migration.
You may ask, why would I ever want to do this? Perhaps you no longer have the software install disks for your critical applications. Or perhaps your software is about to outlive your hardware.
If you are running an old Windows server with custom applications that are hard coded to a specific operating system, it may take years to completely reverse engineer the software, but your physical server might not give you that much time. After all, servers have a finite life. Converting systems like this to VMs can give you the time you need by running on new hardware.
There are really two main methods for running a P2V migration. The first is using the free Microsoft Systinternals Disk2vhd utility. The second is by using System Center Virtual Machine Manager (SCVMM) which is part of the Microsoft System Center suite. While both will allow you to accomplish the same goal ultimately, you will have a VERY different experience with each. Disk2vhd will only convert your physical drives to virtual disks (in VHDx format). Disk2vhd will not build a VM, nor will it create any configuration. It literally only converts a disk to a virtual hard disk.

SCVMM, on the other hand, will automate the entire process for you. You will start off with an easy to use wizard which in turn builds a rather large PowerShell script utilizing the functionality and tools built into Virtual Machine Manager. Once your script is created, you can either proceed to execute, or schedule the process to execute at another time.
Running a Physical to Virtual (P2V) Migration Using System Center Virtual Machine Manager 2012
Assumptions: You are running System Center Virtual Machine Manager 2012 or System Center Virtual Machine Manager 2012 with SP1. The SCVMM server is already configured to manage the Hyper-V host which will be hosting your migrated VM.
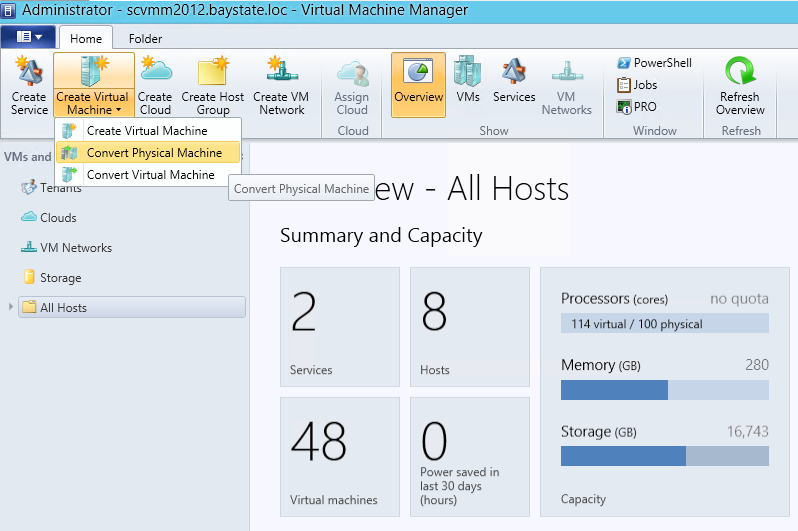
- Open System Center Virtual Machine Manager
- Click VMs and Services
- On the ribbon, click the drop-down for Create Virtual Machine and select Convert Physical Machine.
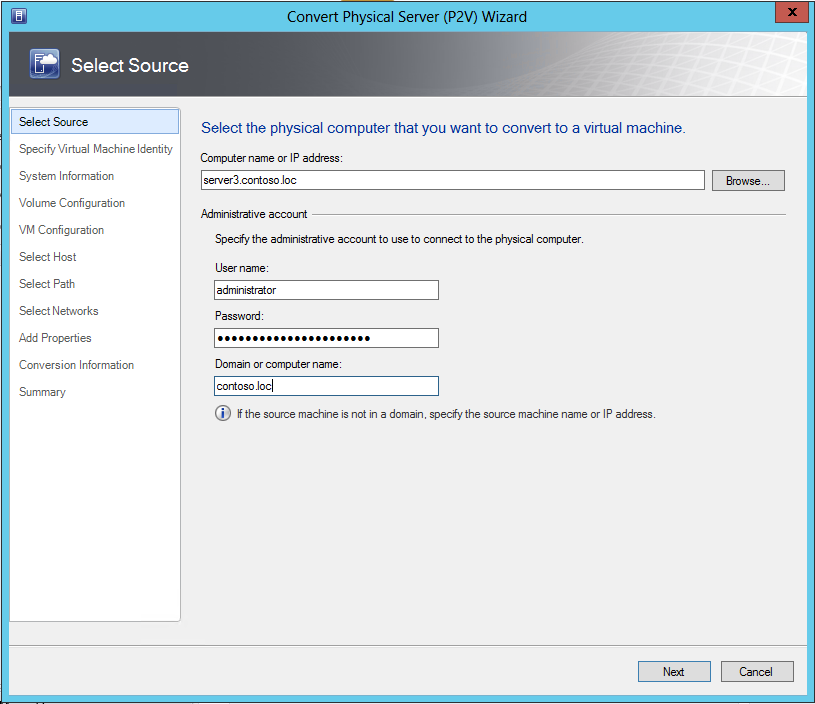
- On the Select Source page, enter the FQDN (fully qualified domain name) of the physical server in which you’d like to migrate to a VM.
- On the System Information page, click on the Scan System button to allow SCVMM to scan the configuration of the physical server. When completed, click on the Next button.

- On the Volume Configuration page, select the volumes which you’d like to migrate. You can also determine whether the converted virtual hard disks (VHDs) will be a static size or dynamically expanding.

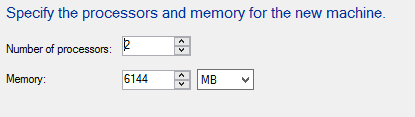
- On the VM Configuration Page, select how many virtual CPUs and the amount of system memory to allocate to the migrated VM.
- Select a Hyper-V server in which to host the converted VM, then click on the Next button.
- Select a path to store the converted VM’s files (including VHDs), then click on the Next button.

- Select the virtual network to connect to any virtual network adapters on the migrated VM. If you are using VLANs (virtual local area network), you can also configure this here. When done, click on the Next button.

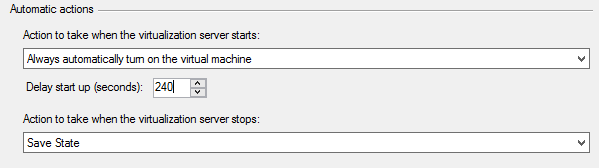
- Select what to do with the VM when the Hyper-V host is shut down or started. When done, click on the Next button.
- On the Summary page, verifiy that all settings are correct. If you would like to boot the VM after the migration is completed, check the Start the virtual machine after deploying it checkbox. You can also click on the View Script button to display the PowerShell script that SCVMM has generated to automate this process. When done, click on the Create button.

- If the P2V migration completes successfully, a migrated VM should exist on the Hyper-V host you chose during the P2V migration wizard. You should now disconnect the physical server from your network to prevent accidentally running it while the VM version is running.
Download Free Windows Server 2012 R2 – Free Trial
Download Free System Center 2012 R2 – Free Trial
3 pings
[…] P2V (Physical to Virtual) Migration […]
[…] P2V (Physical to Virtual) Migration […]
[…] P2V (Physical to Virtual) Migration […]